That brick patio has been holding down your backyard for years, maybe decades. Weather, foot traffic, and the relentless sun have left their mark, but there’s good news: you don’t need to tear it out and start over. A worn brick patio is a blank canvas waiting for a makeover. Whether you’re looking to boost curb appeal, create an inviting gathering space, or simply breathe new life into tired materials, the refresh you need is within reach. Here are seven practical strategies to transform your old brick patio from weathered to wonderful, all without calling in a crew, unless the situation demands it.
Table of Contents
ToggleKey Takeaways
- Assess your brick patio’s condition before investing in improvements—check for cracked bricks, loose mortar, poor drainage, and uneven settling to determine if you need repairs or cosmetic updates.
- Cleaning and sealing your old brick patio is the fastest and smartest refresh, protecting against water damage, freeze-thaw cycles, and extending the lifespan of your bricks and mortar.
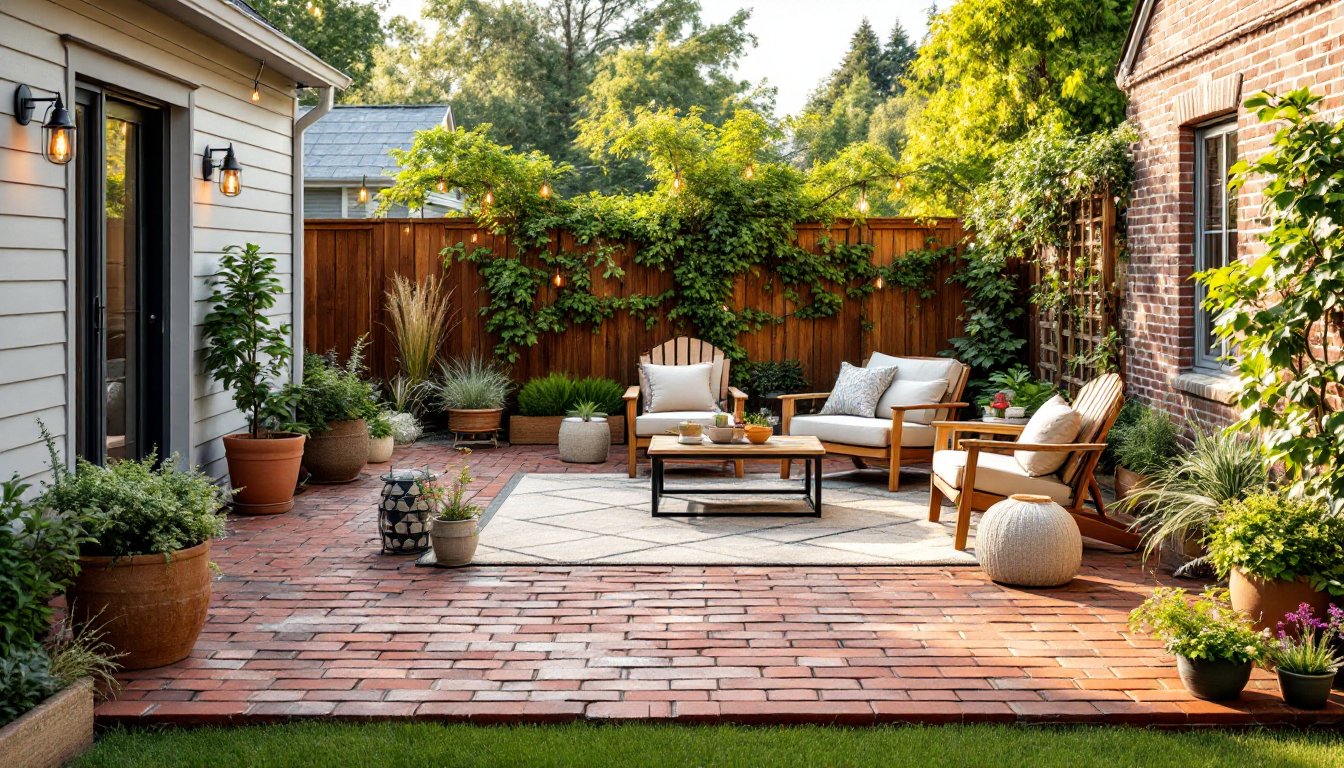
- Add greenery, outdoor furniture, and layered lighting to transform your brick patio into an inviting gathering space that reflects your home’s style and how you actually use it.
- Address damaged bricks and crumbling mortar early through repointing or targeted replacement rather than letting deterioration worsen and require a full patio overhaul.
- Old brick patio ideas like potted plants, string lights, and weather-resistant textiles offer flexible, non-permanent ways to refresh your outdoor living area without major construction.
Assess Your Brick Patio’s Current Condition
Before you invest time and money, walk the patio on a dry day and document what you’re dealing with. Look for cracked or broken bricks, sunken spots, loose mortar joints, and areas where weeds are pushing through. Snap photos from different angles, you’ll need them to decide whether you’re doing cosmetic work or addressing structural issues.
Check for water pooling or soft spots, which often signal poor drainage or a failing base. Gently poke at mortar joints with a screwdriver: if it crumbles easily, repointing (re-grouting) is on your to-do list. Minor cracks in individual bricks are mostly cosmetic, but widespread damage, especially if bricks are tilting or chunks are missing, means repair or replacement can’t wait.
Pay attention to the patio’s foundation too. If bricks have settled unevenly over the years, that’s usually a base issue, not a surface problem. A level patio drains properly and looks intentional. Uneven patios trap water and make furniture wobble.
Clean and Seal Your Bricks for a Fresh Start
A thorough cleaning can transform how old bricks look. Start with a pressure washer set to 2,500 to 3,000 PSI (higher pressures can damage old mortar and brick). Hold the nozzle at a 45-degree angle and move steadily to avoid gouging. For stubborn stains or moss, use a brick-specific cleaner or a mixture of 1 part white vinegar to 3 parts water applied with a stiff brush.
Let the patio dry completely, at least 48 hours, before sealing. A penetrating brick sealer protects against water absorption, which causes freeze-thaw damage, efflorescence (white chalky deposits), and mortar deterioration. Apply it with a roller or pump sprayer, following the manufacturer’s instructions. Most sealers need reapplication every 3 to 5 years, so budget for that.
Skip sealer only if your patio is in a very dry climate and already performs well. Otherwise, sealing is one of the smartest investments you can make for longevity. It’s also the fastest refresh: a clean, sealed brick patio looks dramatically better with minimal effort.
Add Greenery and Landscaping Around Your Patio
Greenery softens the hard edges of brick and makes the space feel lived-in and welcoming. Plant evergreen shrubs or ornamental grasses in raised beds or containers around the patio perimeter to define the space and add visual interest year-round. Creeping plants like creeping phlox or sedums can fill gaps between bricks, creating a cottage-garden feel (though they’ll eventually need weeding and may trap moisture, so use sparingly).
Consider a potted plant strategy instead. Group 3 to 5 containers of varying heights, using terracotta, glazed ceramic, or concrete, at entry points and corners. This approach is flexible: rotate plants seasonally without committing to permanent planting. Herbs in pots are functional and attractive: dwarf conifers add structure: flowering specimens brighten dark corners.
If the patio borders a fence or wall, vertical gardening with trellises and climbing vines adds depth without eating into usable space. Just keep vegetation back from foot traffic to prevent tripping. Landscaping that’s well-maintained looks intentional: overgrown beds just look neglected.
Incorporate New Outdoor Furniture and Decor
Furniture defines a patio’s purpose and style. Swap out rickety old chairs for weather-resistant seating, think Adirondack chairs, teak, or powder-coated metal frames with Sunbrella cushions. A dining table that fits the space (measure first.) anchors the area and makes the patio feel intentional, not just a leftover walkway.
Add layers with textiles and decor. A large outdoor rug (polypropylene or natural fiber designed for moisture) breaks up the brick monotony and defines zones. Throw pillows and a weather-resistant throw blanket warm up the space. String lights, lanterns, or a simple pendant fixture draped overhead creates a gathering vibe without committing to permanent installation.
Incorporate function too: a side table for drinks, a planter with vegetables or herbs, or a fire pit (if clearance allows) turns the patio from “just a brick slab” into a room. The key is choosing pieces that complement your home’s style. Coastal patios need different aesthetics than farmhouse ones, make sure your furniture and layout reinforce the vibe you’re going for.
Upgrade Lighting for Ambiance and Function
Lighting transforms a daytime patio into an evening destination. String lights are the simplest upgrade: drape café-style lights or Edison bulbs overhead on wire or cable, anchoring them to posts, trees, or a pergola. Solar options eliminate wiring, though they’re dimmer and weather-dependent.
Spot lights or uplights tucked into landscaping highlight plants and pathways while adding drama. Low-voltage LED path lights (typically 12-volt) mark edges safely without harsh glare. If you want something more permanent, a hardwired patio fixture or pendant requires running electrical conduit underground, hire a licensed electrician for this to ensure code compliance and safety.
Start simple with battery-powered or solar lights to test what works. Once you know your preferred zones and brightness levels, invest in wired solutions. Layered lighting (overhead ambient, task lights for dining, accent for landscaping) makes the patio functional and beautiful after dark. Warm LED color temperatures (2700K) feel inviting: cooler tones (5000K) work better for security and work areas.
Repair or Replace Damaged Bricks and Mortar
If your patio assessment found cracked bricks or crumbling mortar, now’s the time to fix it. Mortar joints are easier to address than individual bricks. Rent a mortar saw or angle grinder with a diamond blade to cut out failing mortar to a depth of 2 to 2.5 times the joint width. Chisel out debris, dampen the joint (not soaking wet), and pack in new mortar with a pointing tool, matching the original color and profile.
Replacing a single brick is more labor-intensive. You’ll need to remove mortar around the damaged brick, chisel it out, and tap in a new one with fresh mortar. Salvaged bricks from salvage yards often match older patios better than new factory bricks, which tend to look uniformly bright. This is where patience matters: rushed work shows.
Wide-scale brick replacement, more than a handful, might signal that DIY isn’t the best approach. This Old House’s home restoration techniques cover complex repairs in detail, and contractors can assess whether relaying the entire patio is necessary. Permits may be required for structural patio work depending on your jurisdiction, so check with your local building department first.
Conclusion
An old brick patio doesn’t have to be retired, it can be reimagined. Start with cleaning and sealing to maximize what you have, then layer in greenery, lighting, and furniture to create a space that feels intentional and inviting. Address structural issues like damaged bricks or mortar early to prevent bigger problems down the road. The result is a refreshed outdoor living area that honors the bones of your home while reflecting your style and how you actually use the space.